
Tuesday, August 4, 2015
Card Twenty Eight - Quilt
Monday, August 3, 2015
Card Twenty-Seven, Get Well Owl
Made for a sick friend:
 Hero Arts Owl Stamp
Spectrum Noir Markers
Random Paper
Hero Arts Owl Stamp
Spectrum Noir Markers
Random Paper

Friday, July 31, 2015
Card Twenty Six - BoBunny Card Kit
A friend sent me a BoBunny card kit. While there was nothing creative about it, mostly punching out chipboard and attaching it, I did have a good time putting them together. There are times when you don't want to have to think, measure, or be particularly creative, and yet still have something nice at the end. I have not added a greeting yet. The kit came with rub-ons but I'll probably just stamp something.


Tuesday, July 28, 2015
Card Twenty Five - Springtime in Washi Land

It doesn't get much easier than this. Washi tape, a Martha Stewart butterfly punch, buttons and bling. The only thing I did was color in a white button to turn it green.
In real life, the pink of the stamp matches the second stripe of washi - it looks different on camera.
Springtime in the heat of summer!
Monday, July 27, 2015
Card Twenty-Four, Christmas in July

This is a very simple yet elegant card, one which I may mass produce. All it took was red, green, and white cardstock, a Christmas tree stamp, an embossing folder, some washi tape and a glittery star for the top.
Inside:

Sunday, July 26, 2015
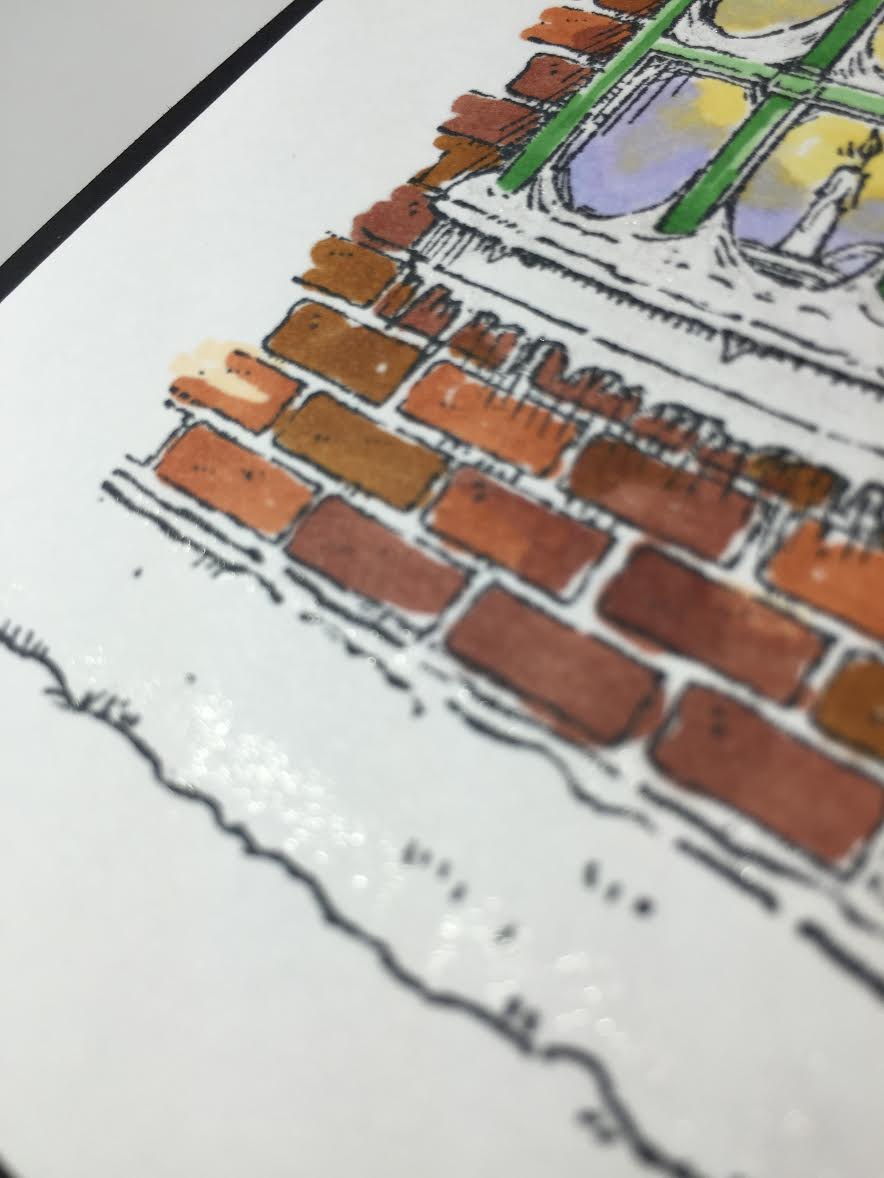
Card Twenty Three - Winter Window Sill

I'd intended it to be a regular card, but it turned out to be long, like a postcard, so I let it be what it wanted. I used a Christmas sentiment underneath and cut another space for me to sign my name. I looks a bit bent in the picture but that's because I had to stand it up to take the picture.
Here are other views of the card. I used colors in the tan range and earth brown range, and for the purple light, I used pale yellow and hibiscus. The windowsill was light green.

Friday, July 24, 2015
Card Twenty-Two - 1950s Lady
I love the 50s and anything from the mid-century era. I found a company called "Flonz" that has a bunch of products focusing on that time, so I bought some paper and some stamps. Here is the first card using their stuff:

I used Versafine ink to stamp the image, then I colored her skin, dress and background shadows with colored pencils from Spectrum Noir. I took a piece of the vintage paper and cut out an oval, which I had to do by hand.
I had some felt flowers from Maya Road and adhered them on in matching colors and added a bling on one flower.. The "Bonjour" stamp was from a Studio Calico kit, I think.... All in all it was a very easy card to make.
I have a lot more of those vintage girls so you'll see them again.
I'm trying to learn how to do backgrounds on them - the shadows confuse me. If anybody knows let me know. You can't leave them white, but outlining them in grey seems wrong too. I need a way to give it depth without actually drawing something. Curious to know what you all do.
Wednesday, July 22, 2015
Card Twenty-One. Lines and Dots and Flowers, oh my!

Today's card was again, a simple one. I cut my cardstock into card shape using a Spellbinders Nestabilities Card Creator Die. For the flowers, I used the Spellbinders Shapabilities Rose Creations. While with this die you put the different sized flowers together to make a rose, I left them separate and used five small pieces in several colors.
I took a ruler and with a micron pen, I drew some lines down the length of the card and every so often drew dots. I glued the flowers on, added black enamel dots to the center, and added some bling every so often down the lines. I didn't have all the right colors of bling - I was going match the flowers in each line but my size and color selection didn't work out. I'm using up stash for this project so am trying not to hit the store, but soon my enamel dots will be gone.
It's a cute spring time card. Somebody will enjoy it in December. :)
Tuesday, July 21, 2015
Card Twenty - Fishies
Sorry about missing a couple days - it has been very busy for me, which means I did two things in two days. I'm going to need to sleep a week to catch up from all that activity!
Who doesn't like cheerful little fish?

I found a digi stamp that I thought was cute. I found some enameled dots in fun colors and patterns, and snapped them up when I saw them as they are usually single colored. I wish I had more but I haven't seen them since I bought them. They make very cute matching bubbles for the fish.
It was very simple. I printed the digi stamp than colored in the fish with spectrum noir markers and fussy cut them out. Found some older blue paper that had a light pattern on it that seemed to match the idea of water and adhered it to cardstock, and then used dimensional adhesive for some of the fish to make them pop. Added the dots - and done.
Fun, easy, and cute. The saying, "Just Keep Swimming" is one of those that is good for those of us with cancer, other diseases or who are facing a rough patch in our lives.
Friday, July 17, 2015
Card Nineteen - Gelato Sunset
Today I took my parent's ashes to the cemetary to be interred, so I was in a sunset mood. I played with gelatos.
 I took a white scrap and scribbled away. Yellow, Orange, Pink and Red, light to dark. I don't have a purple one or I'd probably have gone darker at the top.
I rubbed it with a tissue to get a blend. Unfortunately, I was out of baby wipes, which is the best thing to use to give a softer look to gelatos. I did want some of the lines to show though; I wanted it to look hand-drawn with white spaces.
I used an Inkadinkado silhouette stamp and black StazOn for the plant and butterfly.
Matted it on black cardstock and then on yellow. Tied the top with black baker's twine. This would be a nice sympathy card, or friendship card.
I did seal the gelatos with hairspray.
Another view
I took a white scrap and scribbled away. Yellow, Orange, Pink and Red, light to dark. I don't have a purple one or I'd probably have gone darker at the top.
I rubbed it with a tissue to get a blend. Unfortunately, I was out of baby wipes, which is the best thing to use to give a softer look to gelatos. I did want some of the lines to show though; I wanted it to look hand-drawn with white spaces.
I used an Inkadinkado silhouette stamp and black StazOn for the plant and butterfly.
Matted it on black cardstock and then on yellow. Tied the top with black baker's twine. This would be a nice sympathy card, or friendship card.
I did seal the gelatos with hairspray.
Another view


Thursday, July 16, 2015
Card Eighteen - One Card, Two Designs
Still making cards from my Studio Calico Card Kit. I"m also cognizent of the fact that these cards will be given away in December. So I figured I'd follow the directions for one card with the paper they gave me, and then turn it into a Christmas card with other paper.
What do you think?


 It's just paper. The Christmas tree is a wooden embellishment heat embossed with opaque red. I used a Christmas brad, and a couple of enamel dots, one that I colored brown to match the paper.
I will be saving pretty paper scraps and using this design a lot, I think, with various embellishments. I hate paper going to waste, this is a great solution!
It's just paper. The Christmas tree is a wooden embellishment heat embossed with opaque red. I used a Christmas brad, and a couple of enamel dots, one that I colored brown to match the paper.
I will be saving pretty paper scraps and using this design a lot, I think, with various embellishments. I hate paper going to waste, this is a great solution!
What do you think?


Tuesday, July 14, 2015
Card Seventeen - Berry Sweet

Another homespun farmer style. This is pure paper with one simple brad in the same Herb and Honey line. I used dimensionals to lift the two sections above each other. I did use some embroidery thread to sew on the top and a border punch for the bottom of the plain paper in the center. This card is aligned perfectly, even if the picture doesn't show it. I bought a new paper cutter that does a MUCH better job!
I bought a $40.00 sewing machine about a year ago to sew on paper but I don't know how to use it, so I just did a few hand stitches. One of these times I'll sit down and figure it out.

This is a simple card for anybody to make and you can do it with any sort of paper. I think tomorrow I'll do a Christmas one and not a kit one, even though I do enjoy these. I keep remembering I'll ship them out in December so I think most people will be expecting Christmas cards....oh wait, no I won't. Tomorrow is chemo. So Thursday....

Monday, July 13, 2015
Card Sixteen - Old Fashioned Bottlecap - Twofer!


I ordered a warehouse box from Studio Calico, and was pleased to see I got two card kits, with the ability to make 9 cards from each kit. Because they use the same paper line and embellishments, they will look similar so I'm posting them in groups. Today, I made two cards.
The papers and embellishments are from the Herb and Honey line. You can't see but I poked holes in the bottom right yellow paper, which gives it some dimension.
There was a lot of measuring, and I am pretty bad at measuring. And I suck at gluing too - I really need to repeat kindergarten.
But still, it was nice to have instructions and not have to
I may see if I can scrape up the money and subscribe to the kit for a few months and see what I get. My poor chemo rattled brain liked having instructions to follow.
Sunday, July 12, 2015
Card Fifteen - Graphic Wedding

I have discovered the word "graphic" means black and white, at least in the crafts world.
My sister wanted a card for a wedding she is attending. She wanted champagne colors and I started out using some champagne paper, and the card ended up blue and purple and not only that, off kilter. So I started again, leaving the colors behind. Sometimes you have to follow where inspiration takes you!
I found this lovely black and white heart paper that I'd gotten from Pink Paisley warehouse sale, and started pulling out stuff that matched. I used white cardstock, and some stickers I'd had, by a company called Glitz and Glitter - I found them at Tuesday Morning, I think. And that wonderful leaf ribbon in black, that I didn't end up using but still love. I grabbed some white Martha Stewart heart stickers, colored them black with a Spectrum Noir pen, popped a flat back pearl in the center and called it a day.


But it still seemed flat to me, so I backed everything with black cardstock. And there you go. Graphic wedding card.
Here is the inside using the rest of the sticker:

Wednesday, July 8, 2015
Card Fourteen - Christmas Snowman

Anyway, I got a digi stamp online, colored it with spectrum noir markers, used Stickle's glitter glue for the snowflake. Added a vellum tag which I stamped with Merrry Christmas and used Wow white opaque embossing powder and heat set it. Secured with a flower with an enameled dot for the center. Done.
I'm into coloring these days.


Flowers, scarf, heart and house: DR1, DR3
Copic Green
TN3 wood
TB1 background
Birds were some colored pencils I had.
IG1 for the shadow.
Sunday, July 5, 2015
Card Thirteen - Peacock Spectrum Noir

Today's card is a Peacock, colored with Spectrum Noir Markers, brushed with clear Wink of Stella and Stickles Glitter Glue.

I've been finding coloring very therapeutic lately. In fact, I've become addicted to it. I've colored quite a few cards that I've yet to show but you'll see them soon.
Frustration has entered the building. I'm using my inexpensive but pretty Spectrum Noir alcohol markers. I purchased the entire set at one time, but I've discovering that several have dried out, even though they have not been used. There is an easy fix, involving denatured alcohol (just adding a few drops to the pen and shaking) but I have to go to the hardware store and I've been too busy. Until then, I keep picking up a pen and finding it dry.
I bought the old first gen set, 72 markers - and this is a known issue. Sometimes, you get what you pay for. The whole thing cost me $70.00 and a Copic pen is about $7.00 each so no way would I have had the range of colors in Copics for that amount.
The newest Spectrum Noir set has supposedly solved this problem with a new design and they are still cheap. So I definitely recommend them if you want to use alcohol markers.
Anyway, the card: I got a free peacock picture here. I love you people who put these free stamps out for us to color!
I printed it on index cardstock. Spectrum Noir markers used were the BT line. I used CG4 for the yellow part of the feather and LV1 for the background. I didn't plan ahead for the background so figured I'd fill it with with the LV1, but that's the one that got dry. So I circled as best I could and went over it with Wink of Stella. It is much prettier in person.
Here is a closeup, you can just kind of see the Wink of Stella glitter on the bottom left above the bird's head but it is glittering all over the paper.

I added some Stickles glitter glue on the feathers in Blue/Green below the yellow which you can also sort of see above. I used matching bling in the upper left corner with a Happy Birthday stamp in the bottom right. I used a Hot off the Press Feathers paper pack for the matted background. I'm giving this to a friend whose birthday is tomorrow.
Hopefully, she won't notice that I was running out of ink for the background! It is a pretty card in person, very glittery. I must figure out how to photograph these things.
Wonder if I should do a video of my making them?
Thursday, July 2, 2015
Card Twelve - Simple Flowers

Sometimes, you gotta keep it easy. I had this blue paper from from HunkyDory, an English company. It was part of an Artful Card set. So cut, glue, add flowers, and done!
I cut it so that the dragonfly was in the upper right corner and mounted it on a plain card. The paper in these HunkyDory card packs have embedded foiling which I like. I have several that haven't been opened that are pretty spectacular. One is of cats, very 50s, with their triangle heads and long tails, in foiled pinks and greens of that era. I intended to make a card for my stepdaughter, who loves cats.
I haven't yet because the paper is so thick and heavy it is hard to cut and fold, even using a scoring board.
But I managed - with a new blade on my cutter.
Of course, with a dragonfly you need flowers. I used prima flowers. When I buy things that will be used frequently, like flowers or enamel dots, that sort of thing, I always purchase them in white or cream. That way, I can color them myself to match my pages. Of course, I buy other colors too but it is always good to have plain ones on hand to coordinate.
I took three cream flowers, one which had a silver foil detail, and used my Spectrum Noir markers to match the colors. I put a holographic dazzle in the center of each flower, and used a silver word dazzle for "thanks."
It couldn't have been easier.
And yet, it still took me a long time. I have called myself the slowest scrapbooker in the world and I'm sure that is true. A simple card like this might take me hours.
I did a few others along the same lines, using the same products - dazzles and Hunkydory card papers. The one below has dazzles along the edges, the flowers in the upper right. The word "thanks" with the foiled edges was a punch out and part of a kit.

One thing to keep in mind as you, or I, make cards is they have to go through the mail. So I try not to put too many dimensional objects on them. Sometimes I'll go crazy and then use a padded envelope but for standard mailing you have to remember the post office. So this is why I often choose flat items like Dazzles over other bling I could use.

Wednesday, July 1, 2015
Card Eleven - Shaker Card, Fishies

I had purchased the Fuse, which allows a person to seal plastics together. Because my favorite project is December Daily, (the only books I ever complete) I felt like the tool would come in handy to seal sequins and glittery stuff into those pages. But to be honest, it doesn't work very well. I'm not sure if it's operator error or poorly distributed heat, but I often either burn the plastic or it won't seal.
However, I thought I'd try again. I've been dying to make a little shaker card.
So I took some blue cardstock, stamped some little fish and bubbles on it, and heat embossed with a WOW white opaque embossing powder. I cut the design into a circle using my trusty old Creative Memories Circle Cutter that I bought back 17 years or so ago. (You'd think I'd be better at this by now, wouldn't you?) The system is now discontinued but you can find it on ebay. I have also been using my old creative memories cutting mat until just the past week, when I realized the scarring from knife cuts was too bad. I still intend to use it for gluing. Products that last 20 years are okay in my book! Even if the creative memories style is long gone, their basics are still good.
Back to the card: I plugged in my fuse and took a sheet of regular old page protector. I slipped the fish circle between the page protector sheets and cut around it, but not closely. I then opened it and slipped in some sequins. By then my fuse was heated up so I freehanded the sealing around the circle, leaving an area so I could secure it to the card. Now I had a shaker pocket.
The fuse worked!
I took my creative memories cutting system and cut the same size circle from a base card, and again from the piece of paper I wanted to use. Although it was a botanical print, it reminded me of underwater plant life, and I wanted colors contrasting the blue.
I taped the shaker to the back and covered it with a translucent piece of vellum.


Tuesday, June 30, 2015
Card Ten - Christmas Ruffles
I STILL have pieces of paper leftover from previous cards. I cannot throw away anything but the smallest of scraps. I confess, I'm a paper hoarder. Somebody get me on that Hoarder's show! I'd react the same way they do. "But I'm going to use it someday," I'd whine, visions of unmade cards dancing in my head. Only, my visions are of gorgeous paper and not rodent feces covered Starbucks cups.
I'm a bit more organized too.
Just a bit.
I have a punch that creates these ruffles, so I thought it might be nice to punch the scraps and make a ruffled Christmas card. This punch was a gift and a nice one, I have used it quite a bit.
Is that what you call it, ruffles? Maybe scallops. Chemo-brain makes it near impossible for me to remember the right terms and I've noticed it with each of these card blog posts. Unlike when you are writing creatively, with these you need to know the names.
Sigh.
Anyway, it came out kind of cute. But you can't tell which way it is supposed to go, so I am going to have to put an indicator on the outside.
 See what I mean?
 Back again.
 Here's the inside, so it does matter. Unfortunately, I didn't realize it could go two ways until I was done - and I like it the second way better. OH well, guess that means I'll have to do another.

I thought about using embroidery thread and sewing through the holes, but I decided it was busy enough. I only put red inside so you could see it from the outside.
I'm about done with those scraps....but I still have a few. Hmmm....how creative can I be? I mean, a tree died for my card, I should use the entire product up, right? So if you get a card with scrap of paper just glued to it, you'll know why.
Products used on this card:
Border Punch Scallop (mine is old so I can't find the same brand online)
Red cardstock
WRMK North Pole Christmas Cardstock (I have the 12 x 12 but I can only find it in the 6 x 6 pad)
Red Zing embossing powder
AC "Mistletoe" Christmas Stamps (can't find online)
Versamark
I'm a bit more organized too.
Just a bit.
I have a punch that creates these ruffles, so I thought it might be nice to punch the scraps and make a ruffled Christmas card. This punch was a gift and a nice one, I have used it quite a bit.
Is that what you call it, ruffles? Maybe scallops. Chemo-brain makes it near impossible for me to remember the right terms and I've noticed it with each of these card blog posts. Unlike when you are writing creatively, with these you need to know the names.
Sigh.
Anyway, it came out kind of cute. But you can't tell which way it is supposed to go, so I am going to have to put an indicator on the outside.


I thought about using embroidery thread and sewing through the holes, but I decided it was busy enough. I only put red inside so you could see it from the outside.
I'm about done with those scraps....but I still have a few. Hmmm....how creative can I be? I mean, a tree died for my card, I should use the entire product up, right? So if you get a card with scrap of paper just glued to it, you'll know why.
Products used on this card:
Border Punch Scallop (mine is old so I can't find the same brand online)
Red cardstock
WRMK North Pole Christmas Cardstock (I have the 12 x 12 but I can only find it in the 6 x 6 pad)
Red Zing embossing powder
AC "Mistletoe" Christmas Stamps (can't find online)
Versamark
Monday, June 29, 2015
Card Nine - Spectrum Noir Sunflower

Sunflowers are so cheerful! I have a stamp from IndigoBlu (yes, you've noticed I like their stamps) and so I decided to color.
Coloring is such a meditative thing to do. It reminds you of when you were six, of course, but it is something to do while listening to a podcast or otherwise occupying your mind. For those of us with no artistic ability, coloring can make us feel like artists.

I used Spectrum Noir Alcohol Markers for my coloring. I stuck to the GB (Golden Brown) line for the petals and did the EB (Earth Browns) for the center.
I remember when I ordered them. I was pretty sick at that point, and my day consisted mostly of sleeping. I wanted to do something simple while sitting in the light, so I treated myself to the entire set of alcohol inks. They arrived the same day my friend from Salt Lake City did, (she was coming to maybe say good-bye, hah!). We sat around my dining table and colored pictures we'd printed. Although I was the one who does the artsy crafsy stuff, she turned out to be the much better colorist, knowing where light and shadows should fall.
Oh well, it was still fun for me. She was bored.
So for the card, after I colored it, I fussy cut it out. I mounted it on a piece of wood grain paper. I had a scrap of yellow gingham so put that on the bottom with a golden ribbon. I took another piece of the wood grain and cut a tag and stamped it with a tiny bee and the words "Bee Happy."
I tried a copper zing but it didn't show the details of the Bee so I stick with Versamark Fine black ink. It shows more in person.

I colored two of the sunflowers so you will see another on a different card.
Subscribe to:
Posts (Atom)