Monday, July 27, 2015

Card Twenty-Four, Christmas in July

It's still July, isn't it?

This is a very simple yet elegant card, one which I may mass produce.  All it took was red, green, and white cardstock, a Christmas tree stamp, an embossing folder, some washi tape and a glittery star for the top.


Inside:


Sunday, July 26, 2015

Card Twenty Three - Winter Window Sill

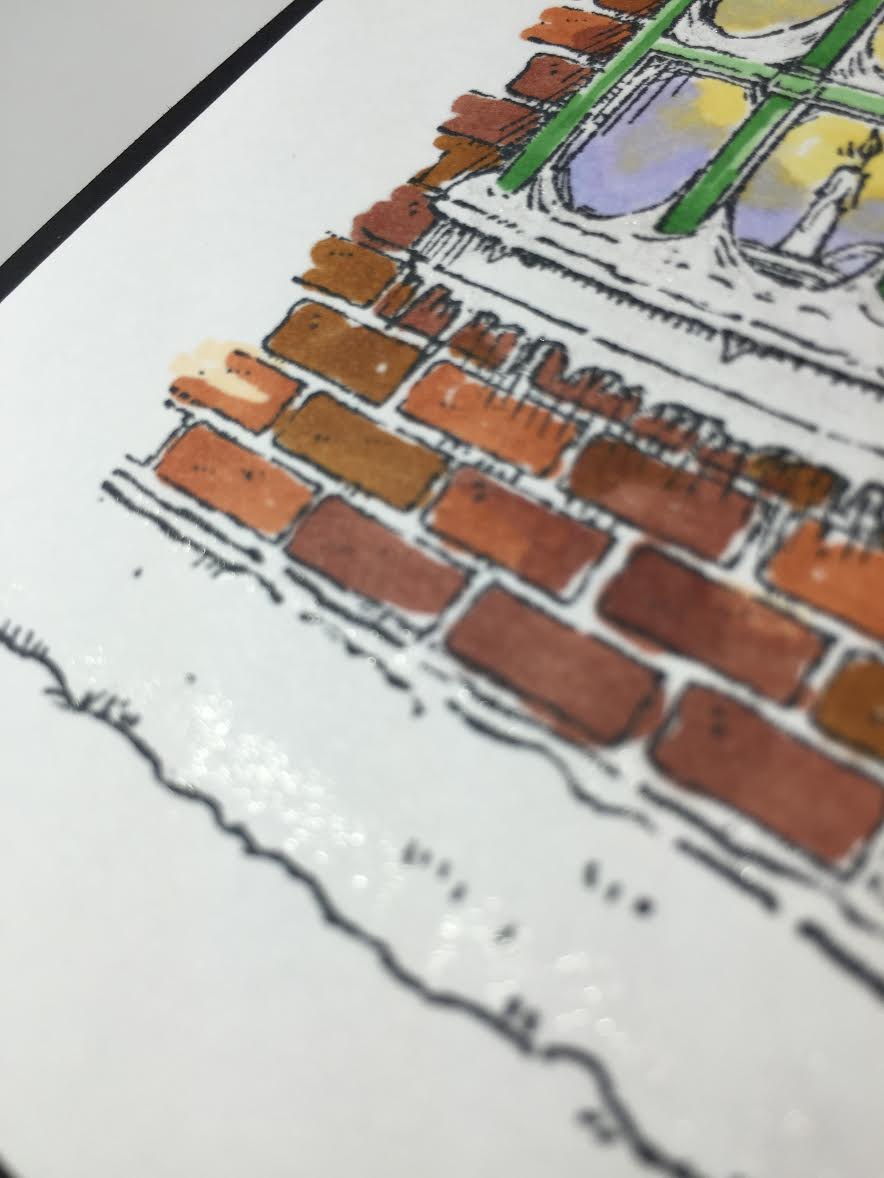
I felt like coloring, and I have a very pretty Penny Black stamp I'd yet to use, so I got out the Momento ink and stamped and then colored with Spectrum Noir Alcohol Ink Pens.

I'd intended it to be a regular card, but it turned out to be long, like a postcard, so I let it be what it wanted.  I used a Christmas sentiment underneath and cut another space for me to sign my name.  I looks a bit bent in the picture but that's because I had to stand it up to take the picture.

Here are other views of the card. I used colors in the tan range and earth brown range, and for the purple light, I used pale yellow and hibiscus.  The windowsill was light green.

I used a Wink of Stella clear glitter pen to highlight the snow. It's very hard to photograph but it adds a little something when you see it in person.

If you want me to tell you what color pens I used in detail, just let me know.

Friday, July 24, 2015

Card Twenty-Two - 1950s Lady

I love the 50s and anything from the mid-century era.  I found a company called "Flonz" that has a bunch of products focusing on that time, so I bought some paper and some stamps.  Here is the first card using their stuff:


I used Versafine ink to stamp the image, then I colored her skin, dress and background shadows with colored pencils from Spectrum Noir.  I took a piece of the vintage paper and cut out an oval, which I had to do by hand.

I had some felt flowers from Maya Road and adhered them on in matching colors and added a bling on one flower..  The "Bonjour" stamp was from a Studio Calico kit, I think....  All in all it was a very easy card to make.

I have a lot more of those vintage girls so you'll see them again.

I'm trying to learn how to do backgrounds on them - the shadows confuse me.  If anybody knows let me know.  You can't leave them white, but outlining them in grey seems wrong too. I need a way to give it depth without actually drawing something.  Curious to know what you all do.

Wednesday, July 22, 2015

Card Twenty-One. Lines and Dots and Flowers, oh my!


Today's card was again, a simple one. I cut my cardstock into card shape using a Spellbinders Nestabilities Card Creator Die. For the flowers, I used the Spellbinders Shapabilities Rose Creations. While with this die you put the different sized flowers together to make a rose, I left them separate and used five small pieces in several colors.

 I took a ruler and with a micron pen, I drew some lines down the length of the card and every so often drew dots. I glued the flowers on, added black enamel dots to the center, and added some bling every so often down the lines.   I didn't have all the right colors of bling - I was going match the flowers in each line but my size and color selection didn't work out.  I'm using up stash for this project so am trying not to hit the store, but soon my enamel dots will be gone.

It's a cute spring time card. Somebody will enjoy it in December. :)

Tuesday, July 21, 2015

Card Twenty - Fishies

Sorry about missing a couple days - it has been very busy for me, which means I did two things in two days.  I'm going to need to sleep a week to catch up from all that activity!

Who doesn't like cheerful little fish?


I found a digi stamp that I thought was cute.  I found some enameled dots in fun colors and patterns, and snapped them up when I saw them as they are usually single colored.  I wish I had more but I haven't seen them since I bought them.  They make very cute matching bubbles for the fish.

It was very simple.  I printed the digi stamp than colored in the fish with spectrum noir markers and fussy cut them out.  Found some older blue paper that had a light pattern on it that seemed to match the idea of water and adhered it to cardstock, and then used dimensional adhesive for some of the fish to make them pop.  Added the dots - and done.

Fun, easy, and cute.  The saying, "Just Keep Swimming" is one of those that is good for those of us with cancer, other diseases or who are facing a rough patch in our lives.

Friday, July 17, 2015

Card Nineteen - Gelato Sunset

Today I took my parent's ashes to the cemetary to be interred, so I was in a sunset mood. I played with gelatos.
I took a white scrap and scribbled away. Yellow, Orange, Pink and Red, light to dark. I don't have a purple one or I'd probably have gone darker at the top. I rubbed it with a tissue to get a blend. Unfortunately, I was out of baby wipes, which is the best thing to use to give a softer look to gelatos. I did want some of the lines to show though; I wanted it to look hand-drawn with white spaces. I used an Inkadinkado silhouette stamp and black StazOn for the plant and butterfly. Matted it on black cardstock and then on yellow. Tied the top with black baker's twine. This would be a nice sympathy card, or friendship card. I did seal the gelatos with hairspray. Another view

Thursday, July 16, 2015

Card Eighteen - One Card, Two Designs

Still making cards from my Studio Calico Card Kit.  I"m also cognizent of the fact that these cards will be given away in December.  So I figured I'd follow the directions for one card with the paper they gave me, and then turn it into a Christmas card with other paper.

What do you think?


It's just paper. The Christmas tree is a wooden embellishment heat embossed with opaque red. I used a Christmas brad, and a couple of enamel dots, one that I colored brown to match the paper. I will be saving pretty paper scraps and using this design a lot, I think, with various embellishments. I hate paper going to waste, this is a great solution!